


Bypass Out-of-the-Box-Experience (OOBE) Internet Requirement
In the "Let's connect you to a network" screen, press Shift+F10 to launch cmd;ncpl.cpl
Type the following command: OOBE\BYPASSNRO
After successful execution, the system will restart and restart the OOBE session box, when you reach the "Let's connect you to a network" screen, click "I don't have Internet", continue to click "limited setup", accept the license agreement and continue to create a local user account.
Begin the Windows 11 setup process.

When you reach the “Let’s connect you to a network” screen with the grayed-out Next button, press Shift + F10 to launch a command prompt.
In the command prompt, run the following command: oobe\BypassNRO This will execute the OOBE BypassNRO command, bypassing the network requirement during Windows 11 setup.
4. Your system will restart after executing the command.
5. After the restart, you will once again be prompted to select your region and keyboard layout. However, this time, on the “Let’s connect you to a network” screen, you will notice a new option: “I don’t have internet.”
Click on the “I don’t have internet” option, and then select “Continue with limited setup.”
Proceed to create a local user account, and the setup will continue.
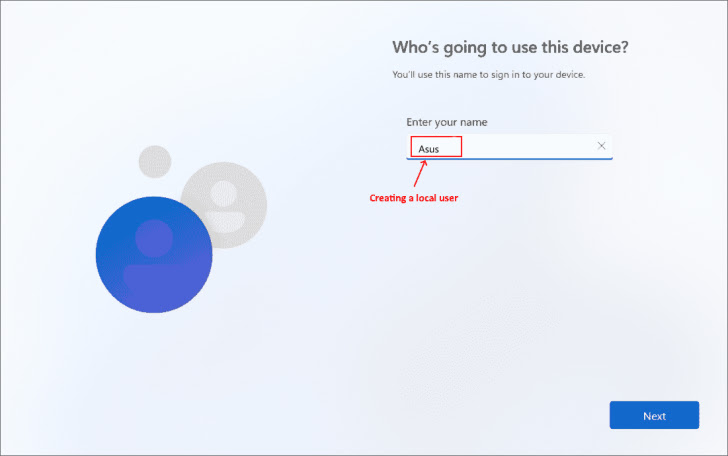
Once the setup is complete, you can use Windows 11 with a local user account.
By following these steps, you have successfully bypassed the internet connection requirement during Windows 11 setup, allowing you to enjoy the operating system with a local user account.


0 Comments